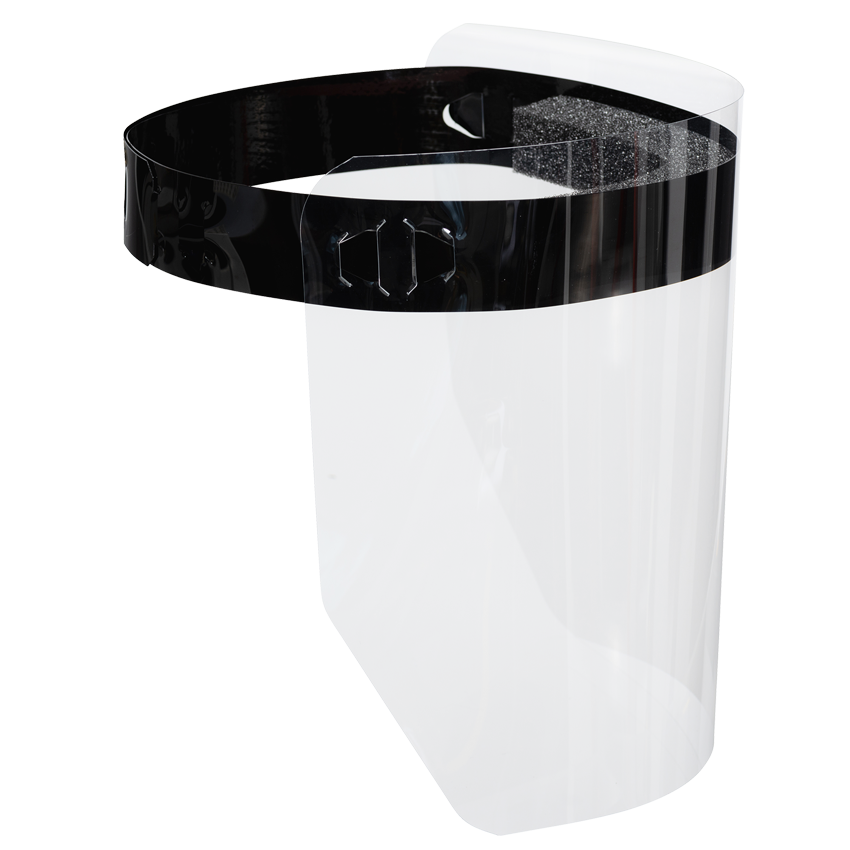
AE101 Face Shield
Assembly Instructions
Health Canada MDEL #14174
Made in Canada by Canadians


This manual is to be read, and all instructions and warnings must be followed.
Note: Some materials that may come in to contact with the wearer’s skin may cause allergic reactions in susceptible individuals. 1) Polyethylene Terephthalate headband and
clear shield; 2) Polyurethane comfort foam.
Face shields delivered to facilities should be considered non-sterile. Consult the CDC for the latest guidance on disinfectants known to be effective against COVID-19.
Face shields are not intended as primary PPE. The face shield should not be used (1) in any surgical setting or where significant exposure to liquid, bodily or other hazardous fluids can be expected; (2) in clinical settings where the infection risk level through inhalation exposure is high; (3) in the presence of a high heat source or flammable gases; (4) against impact hazards or falling objects. We make no warranties, either express or
implied, that the face shield prevents infection or the transmission of viruses or diseases.
Assembly Instructions
Ensure there are three components included in the package:
- Shield FC-001
- Headband HB-012
- Comfort foam band CF-012
Replacement parts can be ordered separately.
Check with your health and safety supervisor to determine whether this face shield offers the proper protection for you. Do not use until proper fit is achieved
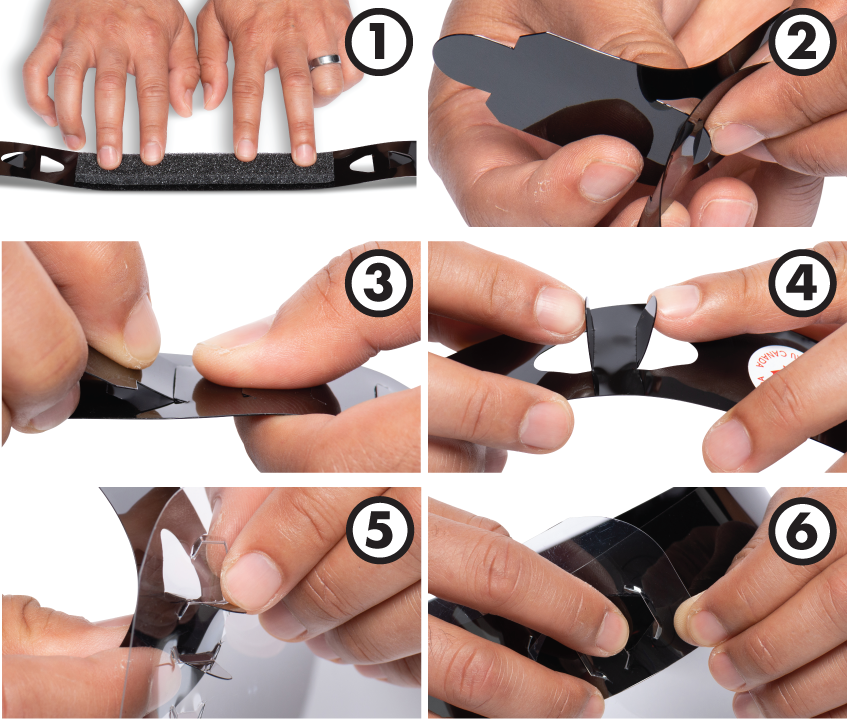
- Peel adhesive backing off comfort foam and press on the headband between four pointed tabs (Figure 1).
- To size the headband: Place the headband around your head to determine best fit position.
- To secure the headband: Firmly insert second last tab into slit that provided the best fit (Figure 2). Once firmly inserted, flex the tail end tab and insert into the slit to secure the headband from coming loose (Figure 3).
- To check fit: Place headband on head to check fit. If too loose or too tight, undo the tabs in the reverse order, and move the tab to the next appropriate slit and re-secure the tabs.
- To insert the shield: Raise the 4-pointed tabs (Figure 4), and insert the shield by flexing it to fit the headband tabs as shown (Figure 5). Once the tabs are threaded through, bend the tabs back and tuck into shield slots to secure (Figure 6).

Cleaning Instructions
Review all instructions carefully, prepare your cleaning area and protect yourself!
Prior to cleaning
Before you start cleaning the face shield, it is important to protect yourself. The use of personal protective equipment (gloves, mask, face shield) is recommended as some cleaning agents may cause irritation or an allergic reaction. For safety reasons, consider the shield you are about to clean contaminated on all surfaces and take the necessary steps to protect yourself.
The face shield can be reused several times if there are no damages to the headband and scratches or haze noted on the shield.
To ensure the shield is cleaned properly, disassembly of the shield
from the headband is recommended.
To remove the shield from the headband:
- Unlatch the headband by:
- Untucking the side tabs
- Squeezing the side tabs to release from the shield
- Remove the shield from the headband
- Undo the headband
Cleaning the face shield
Gently wash both the shield and headband in warm soapy water and dry using a clean dry microfiber cloth.
The face shield can also be sanitized with a high percentage alcohol wipe if washing cannot be accommodated. Disassemble the unit and ensure all surfaces are properly wiped.
Reassemble the unit and inspect the face shield. Discard or discontinue use if damage such as cracks or scratches are noted on the shield or headband.
